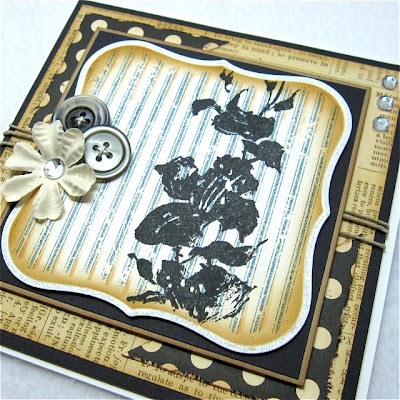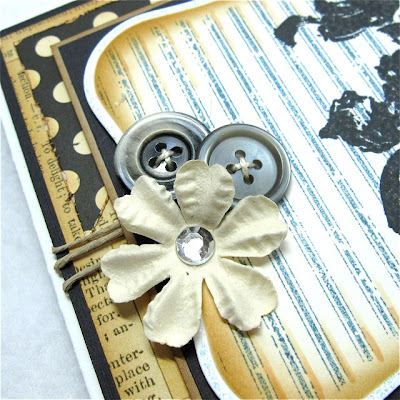


Welcome back. Today I am sharing a simple card with you. So simple, in fact, I didn't even have to break out the Copics for it. It's all about the stamped images, which are big and bold, and the papers, which are really quite subtle.
The faded ticking background is a new stamp by Hero Arts that my mother recently gave me. She's a generous lady and I can tell this is going to be a "go to" stamp. The brushed floral image is by Penny Black. I love these stamps, because they are beautiful and dramatic. I started with my die cut panel in white. I have had a few people ask me about how I add color to my die cuts, so I thought I would describe it, step by step for you. Unfortunately, I don't have any pictures, but if you have any questions, feel free to leave me a comment or send me an email and I'll be happy to answer them.
Uniformly applying Distress Inks to a die cut panel:
- After I emboss the beveled edge onto the die cut, I leave it in the Nestie die so it acts as a stencil. When I shade my die cuts in this manner, I always work on a pad of paper and the top sheet needs to be clean. The pad acts as a cushion and makes is easier to hold the die on, and the clean sheet ensures that I don't drag any unwanted colors onto my panel.
- Next, I use the Tim Holtz foam blending tool to apply the color to the die cut. I have a foam pad dedicated to each color I use. I don't use them for more than one color, because I want the color I am applying to the die cut to remain true.
- I dab the foam blending tool into the Distress Ink pad 2 or 3 times, then I pat it off on the clean sheet of paper a couple of times before I start working it onto my die cut. This seems like a waste, but it helps prevent any harsh lines from appearing on my die cut panel.
- Next, starting off the panel, I begin to work the foam blending tool in a circular motion, then I slowly drag it onto the panel while maintaining that circular pattern. I have found that if I just plop it down on the panel and start blending, I will have a distinctly darker starting point and the color on the finished panel will appear blotchy. Not a good thing.
- I go around the panel and do this several times until I have the color depth that I want.
- I am careful to firmly hold the die cut in place on the panel until I am completely finished. You'll find that the beveled edge that has been embossed onto the panel will aid in keeping the die cut in place.
- After this process is complete, I should have a uniformly colored panel and when I remove the die, I should have a nice, crisp white border around the edge. Be sure and wipe the ink off the die using a damp cloth, before you put it away. Otherwise, it might impart color to the next project you use it on.
I may have to make more cards like these. It only took a couple of hours to make, which is about half the time it normally takes me. That includes picking out images, paper, etc.
By the way, I was at Walmart the other day, trying to pick out some cheap reading glasses. My friend had convinced me that Walmart had them for a dollar...she's a notorious exaggerator...LOL!! The cheapest ones I could find were $8.00. That's not horrible, but I was really wanting to find those $1 glasses she had touted ;D Of course, when I tried them on, I couldn't see a thing. I tried looking around and everything was blurry, then it occurred to me...these are readers. They are for "upclose" work...duh!! I reached over and grabbed the nearest product to read the ingredient list as a test. It just so happened to be a tube of foot cream for Athletes Foot Fungus. I'm sure I was the picture of middle age with my readers perched on the tip of my nose pouring over the contents of this tube of funky foot goo. Anyway, I found some that did the trick and used them the other night. Wow! What a difference! I was able to color up an image without squinting, blinking, holding the image at varying arm lengths to bring it into focus, etc. AND it was easier to cut it out, too! YAY! Of course, my sister stopped by last night and spied them on my desk. She proceeded to make mock. My only satisfaction is that I know, one day, she'll be in the same (blurry) boat ;D
Gorgeous card, Cheryl! I love that Canvas Hero Arts stamp too! It will be so perfect with the Tim Holtz stamps!
ReplyDeleteYou may feel it's a simple card, but it is absolutely beautiful. The colors, paper and layering are perfect for that image!
ReplyDeleteAnother stunner! And what a fab tutorial! I have been wondering how people do that! Simple and brilliant. The end result is fabulous!
ReplyDeleteBeautiful! Thank you for the tutorial, I've been wondering exactly how you got your stenciling so perfect, you make it look airbrushed. And READERS!!! We are about the same age, man I am not looking forward to that although maybe they'll make me feel more like a grownup. NAY ;P
ReplyDeleteGorgeous card!! I love the colors!! Great way to stamp lines in the die cut and then add an image on top of that. Love it!!
ReplyDeleteThis card is stunning hun xxxx
ReplyDeleteVery nice, i love very muche this style !
ReplyDeletexxx
This is so beautiful and thank you so much for the tutorial now I just need to get some nesties and I will be away :D
ReplyDeleteHugs
Amy xx
Cheryl you gave me such a good giggle with your foot cream story, hee hee. But I am blown away to learn that you have been able to create your incredible cards with less than 20-20 vision. Thank you so much for your tutorial!! I just got my first nesties in the mail on Friday so I can't wait to give it a try.
ReplyDeleteLOL...I'm glad to know it takes you a long time to make a card too! This card is beautiful!! Dramatic and striking!
ReplyDelete